Tag Archives: disease

CALAMANSI CULTURAL MANAGEMENT

Standard

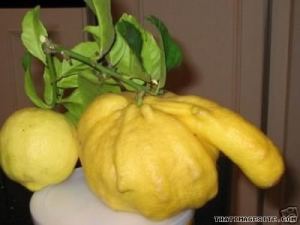
A tree of 5 meters tall armed with spikes of  its branches. It has white flowers and leaves that are oblong.

It can be grown in a cool and elevated field. Suited to sandy loam soil with rich organic composition. It is not suited to water-log areas. It can live long with too much moisture in the soil.

It can be propagated by seeds. But the best propagation is the vegetative parts. A planting materials out from marcotting of the branches is the best.

Plant the marcotted plants during rainy season to good survival of the planting materials. The hole should be 40 centimeters wide and 40 centimeters deep. Set the seedling into the hole. Put back the soil already mix with compost. Water the plants every morning until the plant can surely survive during its growing period. The distance of the planting holes should be 5 meters between plants.

To have a big and excellent fruits, fertilization is a must. Fertilize the plant 1 month after planting. Apply 100 grams of ammonium sulfate or urea fertilizer around the plants per tree/hectare. Repetitive fertilization every 4 months. The rate of fertilization on the second year will be 300 grams per tree/hectare every 4 months.

During the fruiting stage in 4 years, apply complete fertilizer (14-14-14) at the rate of 500 grams per tree. During 8th to 10th year, the rate of complete fertilizer will be 3 kilograms per tree.

In applying fertilizer to the plant, mixed it with soil. Mulch the trees by using dry leaves or rice straw to conserve moisture. Weeds removal should be done as often as necessary.

From 4th year of the trees and onward, application of fertilizer be done 3 times a year, during rainy season before flowering, 2 months after flowering stage and after fruiting.

The presence of zigzag marks, sawed cuts, ragged edges of the bark are signs of pest population. Most of the insects are black beetles, citrus borers. A beetle lay their eggs in the cuts and cavities of the bark. The hatched worm start eating the leaves and bark of the tree.

Spray the trees with EHH solution 3 teaspoons of chemicals every 5 gallons of water. Other pesticides brand, 2 teaspoons every 5 gallons of water. For citrus bark borer, used copper fungicides. Apply the mixture by using brush to paint the infected branches and bark with the solution.

Aphids is a disease carrier that can retard the growth of the plants. Spray with insecticides, 3 teaspoonful in 5 gallons of water. If the infection was severe in some parts of the trees, remove and burn them. Another serious pests is the purple scale sucking the sap of the tree causing leaves and fruits to wither and then fall to the ground. Later on if it cannot survive, it will die prematurely.

Disease of the plants are gummasis, cooker and scabs. Gummasis is a sticky substance flowing out from the branch of the tree. Spray with fungicides directly  to the affected bark.

Citrus cooker is caused by bacteria due to raised lesion, an oily substances on the leaves, twigs, branches and fruits. Detach the fruits from the branch by using scissors. Take extra careful to protect the fruits from any cuts. In removing the fruits, protect the branches and leaves from damage.

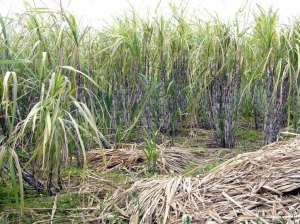
SUGAR CANE CULTURAL MANAGEMENT

Standard

There are many varieties of sugarcane. Select a variety that can give better productivity during the crop season. It is also important that the variety you choose is a drought-resistant variety.

Have a good planting materials. Carefully select only those with good quality cane points. It should be a fresh cut. Do not use planting materials that you found to be diseased, very thin, over-aged and some sign of damaged to the cane.

All cuttings of cane points should be treated with fungicides 2 days after to control the disease that will emerge during the growing period. A ratoon cane is more tolerant to dry season because it uses the root system of the preceding cropping to have the necessary moisture for the soil in the first few months of its growth.

If you select a deep-rooting planting. Plow the field deep up to 45 centimeters to break or loosen the soil. Plant the cane points immediately after plowing to minimize the loss of moisture in the soil. Harrow the field, make furrows and start planting. Don’t allow the plowed field to be exposed to the sun while waiting for the schedule planting. It should be done immediately and promptly.

Any leaf-over grass and other trash materials in the field from previous cropping should not be burn.  This will form part as organic materials when decayed. This is to improve fertility of the soil and its soil composition.

While preparing the land, mix cane trash with the soil during the plowing. Incorporate all other waste cane materials like bagasse that started to decompose and organic manure (animal) to improve soil’s ability to hold enough moisture in the soil.

Mulch ratoon with cane trash materials. It helps to reduce loss of moisture through evaporation. In order to have an immediate germination of cane points, plant if there’s enough moisture in the soil especially during occasional raining. It is good to prepare the land and planting activities during the period of wet condition so that enough water can be absorb by the field. If irrigation is needed, do as necessary.

Limit your plant density according to the allowed space distance. Increasing density of the plants will only lead to competition in getting moisture in the soil. Plat the cane points deeply. Place the canes horizontally in deep furrows 30 centimeters from the top of the ridge to the bottom of the furrow. Cover it with fine soil 15 centimeters deep and compact the soil.

Apply basal fertilizer by broadcasting at the bottom of the furrows based on schedule. Don’t apply 100% of fertilizer requirements during planting. Share only part of such requirement. Follow the schedule of basal application.

For ratoon cane basal fertilizer application, it should  be done along the cane row to cover the fertilizer with soil application can be done even if the soil is dry. Top dress the plant only if soil moisture is enough for cane growth.

Minimize tillage of the soil to avoid moisture loss but frequent inter-row cultivation may help to improve moisture of the soil. Proper weed control minimize moisture loose in the soil. Use chemical herbicides in addition to manual weeding to assure that the plants will grow solely without any competition.

Hill up the soil along the cane row. This is to cover the applied fertilizer with soil. During drought period, you should have enough irrigation equipment to do the flooding and sprinkling. You can use drip irrigation to restore rapid water loss due to drought.

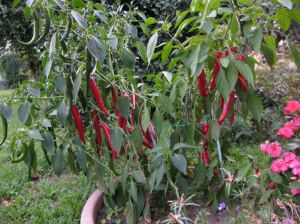
HOT PEPPER CULTURAL MANAGEMENT

Standard

A perennial plants with small tapering fruits. The color of most varieties are red, yellow, black and purple. Has pungent smell. Has greenish white flower.

It can be grown in mid or low elevation field. Best suited to a sandy loam soil with a cool dry weather.

Prepare the seedbed. Incorporate to the soil equal parts of animal manure and rice hull charcoal to make the soil more fertile and better aeration. Sow in line 250 grams of seeds to the seedbed. Space the shallow line 15 centimeters apart. Water the seedbed  before and after sowing the seeds. Mulch the area with rice hull and rice straw or cogon grass to protect moisture of the soil during emergence of seeds. Make a partial shading to protect the soil or seedlings from the direct  heat of the sun. But after one week of emergence and before transplanting, harden the seedlings to sunlight to have a better chance of survival and good plant stands.

Prepare the land. Cultivate it thoroughly. Plow and harrow 3 times to ensure that all weeds is taken out including weed seeds. Make a plot of 1 meter wide for 2 rows plot planting in small areas cultivated. But in bigger areas, the measurement of the furrows is .75 meters apart for single-row planting. Apply basal fertilizer of 7 bags per hectare (complete) 14-14-14 and 5-10 tons/hectare of animal manure.

Transplant the seedlings at the spacing of 1/2 meter between hills. Hot pepper grow best in dry season in full sunlight. It can also grow even in partial shading of trees in the field.

Transplant the seeds 5 weeks old. Plant only those healthy and sturdy seedlings. Prepare raised beds 1 meter wide, 30 cm high. The spacing between hills and rows should be 50 cm with 2 rows in each bed. Make a hole in the bed. Put compost or animal manure. Place 1-2 seedlings in a hole and cover it with soil. Press the soil lightly near the stem to compact the soil and protect the plants from the rain.

Water the plant immediately after the transplanting. Fertilize the seedlings with inorganic fertilizer. Using animal manure and compost is of much help to have the soil enough nutrients for plant’s growth.

Apply water once a week or water it as often as needed. Mulch the field to conserve moisture. Use grasses, sawdust, rice straw, plastic sheets can reduce watering by 1/2 of its allotment.

Control bacterial wilt by using fungicides. This disease is the cause of the wilting of leaves due to virus in the soil. If the infection is severe, uproot the plants severely affected and bury them to prevent further contamination (leaf curling, fern-like leaves).

Common pests are mites, armyworm, stemborers and fruit fly. Spray the plants with hot pepper extract, safe and economical in pests prevention. Thrips will attack during dry weather. If can’t be prevented by the use of hot pepper extract, the commercial pesticides is the answer. Spray the plants according to manufacturer’s instruction.

Harvest mature green or fully ripened (red) fruits. Use cartons, bamboo creates or plastic boxes. Banana leaves is a good protection medium of the fruits while in container.

After 5 days from harvest, airdry or sundry the seeds extracted from the fruits. Put dried seeds in a bottle. Seal it and store in a cool, dry place.

PEANUT CULTURAL MANAGEMENT

Standard

Peanut can be planted in a well-drained, sandy loam or silt loam with pH level of 6.8 below. Plow and harrow the field alternating 2 times. Set furrow 60 centimeters apart. Use 4 bags of complete fertilizer (14-14-14). Make a hole in the soil to put the  the fertilizer in the furrow. Cover the hole with thin layer of fine soil before sowing.

Sow the seed evenly. Put 2-3 seeds per hill. Spacing is 25 centimeters apart at the depth of 4 centimeters. Water the plant regularly especially during germination of seeds, flowering stages, pod development and pod-filling stage.

-Do off-barring 15 days after emergence. Spot weed the plants immediately after hilling up.  Spray appropriate pesticide or fungicide control of any sign of infestation or infection of pest and disease, respectively. Plow the field in one passing to soften the soil easy to harvest the plant by hand pulling. Handpick the pods. Separate the matured pods with the immature once.

Dry the pods in 3-4 days to reduce moisture content to 8%. Place the seeds in an airtight container. Store it in a cool, dry place while waiting for the time of transplanting the seeds to market.

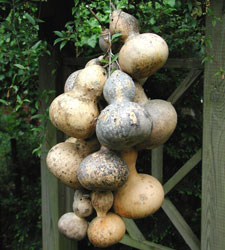
BOTTLE GOURD CULTURAL MANAGEMENT

Standard

A herbaceous, annual climbing plants. It has a long tendrils and simple leaves. Fruits are globular or any other shape depending on the varieties planted. It has hard rind. It has different sizes and form. As vegetable, good to be boiled or stewed.

Plow and harrow the field thoroughly to remove all weeds in the field including those that started to germinate. You need 2 kilograms of seeds enough for 1 hectare. To germinate the seeds quickly, soak seeds in water for 24 hours. Wrap it in moist cloth until it breaks the seedcoat. Sow 2 seeds per hill. Cover the sowed seeds with soil thinly enough to protect it from rain or heat.

Sow the seed in a distance of 1 meter between hills and 4 meters between rows. The soil should be fertile with good aeration capacity. To further enrich the soil composition, apply 20 grams per hill during the planting. Further, sidedress by the application of 10 grams/hill of urea (46-0-0) during the vining of the plants. Apply 2 parts of urea and 1 part of muriate of potash (0-0-60) as sidedressing at the rate of 10 grams per hill after 15 days.

As gourd is a plant vines; it should be accommodated by putting up trellises to protect the fruits from deformation and rotting. The design should be to construct vertical and overhead trellis by using bamboo poles, or wood posts or hardwood trees with connecting materials from post to post with the use of G.I. wires, abaca twines and straw twines. The interconnection will be the concrete support for the plant during its vining and fruiting stage.

Pruning is one way of removing unproductive vines. Let the vines climb in the vertical poles serving as ladder until it reaches the overhead trellis as home during their growing and fruiting stage and support the weight of its foliage and fruits. Prune the lateral (lower) branches of the main stem to have a good branching and fruiting ability.

Make it a point to have an adequate drainage of the field to control waterlogging especially during rainy season.

During dry season, provide enough mulch to conserve moisture in the soil. This is also an adequate because there will be a lesser watering of the plants.

The popular insect pests of gourd plant is leaf folder, yellow beetles and fruit fly. The common diseases were mildew, leaf spot.

It is important to check the plant daily and regularly to see their condition and what necessary steps to be done of any sign of disease infestation and pest problem.

A good sanitation habit is important to control pest and disease. It is important to have a schedule application of pesticides and fungicides during the growing and fruiting period of the plants.

Once the plants started fruiting, utmost attention is needed to harvest the fruits reaching marketable size within 15 days  from fruit set to avoid over-mature of fruits. Harvesting be done as often as needed. Use sharp knives to cut the peduncle 5 centimers from the fruit base.

SQUASH CULTURAL MANAGEMENT

Standard

Squash need a good climate, relatively dry, or warm climate for better growth of the plants. It should have an optimum temperature of 30-C.

Squash can be grown in any types of soil. It is best suited in a sandy loam soil. It should be well-drained free from population of nematodes and bacterial wilt. It is important to select a suitable place to start planting.

Squash can grow in a less cultivated plant. Plow and harrow the field 3 times to remove all existing weeds and new germinated seeds that may affect the growth of the plant later on. This is also to soften the soil, friable and have a good soil composition. Harrow it crosswise twice to assure that emerging weeds is completely remove.

Make furrows of 16 centimeters deep to provide a drainage canal to control waterlogged areas.

Squash can be raised either by transplanting or direct seeding. Most recommended time to plant is during rainy season. Plant seeds in a mound or raised hill. During dry season, plant the seeds on depression when preparing the land. Sow seeds 2-3 pieces per hill. Any weak and disease plants should be remove to be done 3-4 weeks of emergence. It is best if only one healthy plants is raised per hill for fast growth.

If raised by transplanting, prepare a seedbed. Make sure that the soil in the seedbed is fertile, friable with sand as compost.

Transplant the seedling to the thoroughly prepared field. Transfer it 2 weeks after sowing when leaves already develop fully. Harden the seedling by slowly decreasing watering quantity. Expose them to the heat of the sun to reduce shocks during the transplanting to have a good seedling stand. It can also promote better survival of the plant after transplanting. Press the soil gently around the plants’ root. Water it immediately and regularly for 1 week until they are fully established.

The spacing should be 3 meters x 3 meters between plants and rows if planted during wet season. If planted in dry season, the spacing should be 2.5 meters x 3 meters.

Mix animal manure and compost to that of the soil at the rate of 2 kilograms per hill with complete fertilizer (14-14-14) at the rate of 10 grams per hill during planting the seedling. Side-dress with urea 1/2 tablespoon per plant, a month after planting. You have to sidedress it with potash, 1 tablespoon per plant after last cultivation or 2 weeks after the first sidedressing. Side-dress with urea and potash every 15 days.

Mulch surface of the ground to conserve moisture and weeds control during dry season. During wet season, it controls erosion of fertile top soils. It also protect the fruits away from the ground to avoid being damage. Use rice straw or rice hull, cogon grass or bagasse.

Water the plants during its growing period. Apply water by using furrow irrigation.

Spray the plants under designated schedule of application to control pests and diseases at the early stage especially during growing, flowering and fruiting stages.

Strict sanitation habit can prevent insect population and disease infestation. Remove all weeds that will affect the life of the plant. Use hand weeding to protect the crawling vines. It can be done by hilling-up inter-row cultivation. Avoid deep cultivation to protect the root. Minimize application of insecticides during flowering stage to avoid killing insect pollinators that make the flowers into fruits.

Harvest fruits when fully ripe or the peduncles is dried up. Cut the fruits with sharp knife leaving a little portion of stem near the fruits.

Squash can ber stored sufficient or longer time in a dry environment because of its thick rind. Avoid storing bruise fruits. It will start rotting when stored a longer period of time while waiting for a good price  in the market.

UBI CULTURAL MANAGEMENT

Standard

Ubi is a tuber root crop. Already grown as commercial crops. Its tuber is used in different food preparation. It contains vitamins and minerals and other essential nutrients.

It grows best in well-drained sandy loam soil and silt loam soil or clay loam soil especially if it has high organic properties. It can be planted in lowland or highland with an elevation of 2,500 meters above sea level. For good normal growth best temperatures for the plants is 26 to 30’C.

As ubi needs enough moisture for its development throughout the planting stage up to maturity period, irrigate the field. It is only applicable to those planted in lowland areas. Not applicable in high elevation. Even without the supply of enough water for the highland varieties, it can still grow well from the moisture around the field. But if it has a long season of drought, growth and yield are affected.

Plow and harrow the field deep twice to loosen the soil. The grass taken during land cultivation can be used as alternative fertilizer when it become compost.

The planting materials to use is setts taken from the large tubers. Tubers can be sliced into several setts by utilizing its head, middle and tail. Treat setts by applying wood ash or fungicides to keep away free from fungal infection. If planted, ubi is best suited in a flat or ridge seedbed. Construct ridges 60 centimeters apart. In a sloping or rolling areas, contour the ridges. This is to minimize soil erosion.

In a mound method, draw top soil first into piles. Use a hoe to break the soil for better root development. Planting of the setts can be done anytime for as long as the tuber dormancy is broken. It is best to plant during rainy days. Plant setts in the seedbed. The distance should be 1 meter x 50 centimeters or an ideal 60 cm x 60 cm. Plant the setts at the deep of 10 cm. The sprouts should be in upward position.

The purpose of mulching is important to the life of ubi. It conserves soil moisture, increases temperature of the soil for possible dryness, and can control weeds development. Using rice straw is best mulching materials to use. See to it that rice straw is free from insect infestation. Mulch the areas right after the planting.

In the absence of a pre-sprouted setts without mulching materials, you have to do weeding 3 to 4 times or even more as necessary. But those with protection from weeds, you can do weeding 2 times in 2 months interval.

Through experience, a setts that is planted without doing pre-sprouting is mostly has high mortality rate. It is necessary to plant the setts with enough sprouts.

Hill-up the ridges once every 2-3 months after planting. It is important to allow tubers to develop properly. Hand tools maybe used.

As ubi is a clinging vines, installing stakes is a must especially if the plants started to crawl looking for something to hold. Provide stakes (trellis) with measurement of 2 meters high to support density of leaves.

Before doing planting, it is best if you have a soil analysis of the area in order to apply the right rate of fertilizer application and to know the deficiency of the soil.

You need 4 bags of complete fertilizer (14-14-14) per hectare before planting. Additional 4 bags of complete fertilizer 2 months after the first application. Apply nitrogen fertilizer one month after planting at the rate of 2 bags/hectare. During tuber formation apply 3 bags of potassium fertilizer.

Prevent fungal diseases. If the infection is severe, uproot the plants and bury them. Apply regular application of fungicides to control or minimize infection every 2 weeks.

Remove rotten tubers to prevent spreading to other plants. Have a regular check on the plants to determine its condition for immediate prevention.

Harvest tubers when the leaves turn yellow and beginning to die.

PECHAY CULTURAL MANAGEMENT

Standard

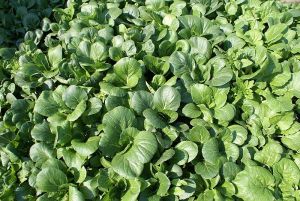
Pechay is an annual biennial herb. Its leaves are smooth, 30 cm long, broad at the tip narrowing gradually at the base extending downward to the upper end of its elongated, thick and whitish stalks. The leaves are erect, flowers are pale yellow.

In selecting an ideal sites, consider the following:

-Good water supply near the area.

-The fertility of the soil.

-Good drainage system during wet season.

-Windbreak and shade are available to prevent direct exposure to sunlight.

-Favorable climate for growth.

-Sufficient protection against farm animals.

Select a place not far from your house, easy for you to attend at all times. Pechay still need sunlight lightly for energy. It is important that there is a shade so that exposure to the sun is limited.

Pechay can be grown in any type of soil. The plants become more healthy to  light, sandy-loam and well-drained soil with pH level of 5-4-6.7.

Pechay need climate with limited rainy season and short dry season not to exceed for 2 months. It can be grown by seeds. You can buy seeds at any farm supply.

Before sowing the seeds, see to it that the seeds you are using are quality seeds free from mixture of other varieties. It should be pure kind of one variety. That there should be no weed seeds mix to the variety you will use in planting. Further, it should be free from any seed-borne diseases.

Prepare seedbeds with measurement of 45 cm x 30 cm x 7.5 centimeters. For seedbed one meter wide x 5 meters long. You need a fertile and friable soil for the seeds. Mix 1 part of sand, 1 part of compost and one part garden soil. With a sand it provides drainage and aeration. Compost can increase soil texture and good fertility. Garden soil is good in root development.

In the event of rainy season, protect your seed-box or seedling from the rain. Construct a shade made of polyvinyl above the seed-box.

Sow thinly the seeds to shallow furrows. The use of paper pocket is an easy method to drop the seed evenly to the furrow. Cover the soil gently pressing them. This is to prevent seed exposure during watering.

The seed-box or seedbed should be watered 3 times a day to give enough moisture to the soil. Do this for the first 3 days. Seeds will germinate 4 to 7 days from the date of sowing. Regulate the degree of watering to avoid damping off and to have a sturdy seedlings.

If the seeds are sown thickly,  prick the seedlings as true leaves begin to appear.This is to allow uniform, healthy and vigorous seedlings. Make sure that the distance and the depth of pricking must be uniformly done. Harden the seedling before transplanting to manage the stress of transplanting. Decrease the frequency of watering, expose seedlings to sunshine.

Plow the field thoroughly. Harrow it lengthwise and crosswise to make the soil loosen, friable and soft. You need to follow the field for 7 days. This is to allow the weeds to decompose and the new weeds to germinate. Then plow again. Harrow it crosswise to break the clods and bury the decomposing and new germinated seed. Plow for the 3rd time and harrow it again crosswise to level the field.

To keep the soil fertile in the field, mix manure, compost, organic matter and soil before plowing it. Water the seedlings of 40 grams of starter solution 15 teaspoons of complete fertilizer dissolved in a can of water enough for the mixing. Spray it to 5-square meter bed 5 to 7 days before transplanting.

Water the seed-boxes or seedbeds thoroughly a day before transplanting. The purpose for easy pulling of the seedling to minimize root injury that may cause the plant to wither.

Transplant the seedling anytime of the day. see to it that the beds of furrows should have enough water and irrigate adequately after the transplanting to ensure survival of the seedlings. It is better to do the transplanting in the late afternoon to reduce stress of transplanting. The age of the seedling before transplanting should be 9-12 days old.

Correct spacing is important in transplanting. A distance of 25 centimeters between hills and 90 centimeters between rows is the ideal spacing. Cover the transplant seedlings with enough soil to protect the roots. Press the soil around it and water the plants immediately. Each hole ready for transplanting should be poured with starter solution for the plants to grow healthy.

Pechay needs much water during its growing period. Water the plants early in the morning to prevent suncald. This is also to make the foliage dry before the night.

Use sprinkler in watering the plants. If the area is big enough to do the watering by using sprinkler, then do surface irrigation to the soil surface of the furrow. But it is too expensive while using sprinkler is easy to do, only it is laborious.

Use complete fertilizer (14-14-14) to give the plants enough nutrients. additionally apply the plants with organic fertilizer (animal manure and compost).

In one hectare, apply inorganic fertilizer at the rate of 240 kilograms of nitrogen, 60 kilograms of phosphorus, and 60 kilograms of potassium. Side-dress the plant with 120 kilograms of nitrogen a month after transplanting.

The purpose of plowing and harrowing several times is to loosen the soil and destroy the emerging weeds. Doing cultivation, it will aerates the soil and conserve moisture.

The purpose of thorough weeding is to control insects to harbor to the weeds. Weeds can also reduce the yield and quality of pechay. It will also compete with the plants in obtaining water, soil nutrients and lights.

Control weeds by hand weeding and mulching. Mulching materials to use are rice straw, rice hulls, sawdust spreading it to the ground around the plants or in between rows. Weeds can also be controlled by using herbicides. It is more efficient but also expensive.

Pechay can easily be attack by insects and other harmful pests by punching small holes to the leaves. It is a must to spray the plants with insecticides until ready to harvest. Schedule the spray once a week. Spray the leaves if dry. Do not spray the leaves 10 days before harvesting.

If attack by disease, use fungicides under recommended rate in the bottle. Harvest the plant 45 days after transplanting. Start your harvesting when there is enough vigorous leaves formed. Do it in the late afternoon to avoid wilting.

Separate the best crop and trim leaves. Do the bundling and packing. Wash pechay in the evening. You can transport pechay to the market at the early morning to have a good price.

SWEET POTATO CULTURAL MANAGEMENT

Standard

Select varieties suitable to your area. There are many varieties to select that are resistant to pests and have bigger yield. Some varieties matures within 1–120 days with 60% dry weight sugar.

Plow and harrow the field two times to loosen the soil to become friable. Make furrows at the distance of 100 cm apart.

Apply fertilizers in furrows uniformly of 4 bags of complete fertilizer (14-14-14) per hectare. Cover it with thin soil.

Best planting materials is the stem cuttings. Plant 1 cutting per hill with the distance of 30 cm apart. Irrigate the field after planting is done. During dry season, irrigate the land one time every two weeks.

To control weeds, pass a plow in-between furrows about 12 days after planting. Then do hand-weeding for those areas that cannot be reach by a single pass of the plow. Hill-up the plants upon reaching 27-30 days after planting time. The purpose is to have a better tuber formation.

Spraying pesticides is one way to eradicate pests in the plants. Follow manufacturers guidelines on correct application of the chemicals per hectare.

A good time to harvest tubers when maturity reach 80-90 days after planting. There are varieties who matured lately within the period of 120-150 days. Select only those varieties that has a short time maturity period.

Clean the tubers without inflicting damage to the skin for a good market price and longer period of storage. Select only those tubers with marketable size. You can place the tubers in sacks for easy transport.

TARO CULTURAL MANAGEMENT

Standard

Taro is grown as staple crop. It can be cultivated in upland and lowland areas. The cormels and corms are being baked, fried, boiled or roasted. It is also eaten as vegetables. Its leaves and petiole are good vegetables cook in selected palatable menus especially if cook with grated coconut.

It can be grown in all kinds of soil types. Best in a friable loam soil, well-drained land. It can be planted in moist environment, in rice paddies and even in your own backyard.

In lowland varieties, it can be grown submerge in water, in a rice paddies or areas where the soil is always moist. While the upland variety needed water occasionally during the period of its growth.

In lowland, clear the land. Flood the area. After 3 days, plow and harrow the land 4 times. Let the land stay in water 2 days before planting. The purpose is to soften the soil particles.

In upland, clear the land. Plow and harrow until the soil is loose and friable. Make furrows more or less 30 centimeters deep.

Use corms or cormels or stem cuttings as your planting materials. It is common to use stem cuttings that gives more yield compared to other types of propagation. Taro can be planted anytime of the year.

In highland culture, plant at the start of rainy season where irrigation facilities are available.

In lowland culture, where moisture is always available, use spacing of 60 cm x 60 cm between plants.

Compost or organic fertilizer can also be applied together with complete fertilizer (14-14-14) 2 weeks before planting. Apply the rate of 400-500 kg/hectare.

Fertilize the plants for rapid development of the leaves and normal enlargement of the corms. Apply compost to the soil to ensure fertility for fast growth of the plants.

In order to control the taro pests, use the commercial insecticides 7-14 days interval at the rate of 3 teaspoons in 4 gallons of water. This is to control leafhopper, mealy bugs, mites, grasshopper, and leaf roller.

Most of the diseases of gabi or taro are leaf blight and tuber rot. Control them with appropriate rate of fungicides. This is to additionally control other viral diseases.

Nematode infestation causes stunting of the plants, formation of galls in the roots and irregular swelling of the corms. Application of nematicides is the only solution.

Harvest the plants only when most of the leaves turn yellow. Lowland cultivars matures 9-12 months after planting. There are variety of taro that can be harvested within 7 months after planting.

Upland taro matures 5-10 months. Harvest during dry weather to easy for the plants to be lifted by pulling with the hands.

Avoid making any bruises to the corms. This will be the starting point for the corms to rot. Utmost care should be given during the harvesting period.

After harvest store in a well-ventilated place, those corms free from injury. It can be stored up to six months by maintaining the temperature of  7’c or 50’F. If lowest, the corms will decay in 8 weeks.